One of the biggest headaches in UI test automation is capturing element locators for a complete user journey. Traditional tools, like browser DevTools or even Playwright Codegen, are designed to work on a single, static page. They are great for simple tasks, but the moment you need to interact with a page—like filling out a form and clicking a login button—their limitations become a major bottleneck.
The Challenge: The Impossible Multi-Step Flow
Imagine a standard login flow:
- Navigate to the login page.
- Find the selector for the username field.
- Find the selector for the password field.
- Find the selector for the login button.
- After logging in, you land on the dashboard, where you need to find the selector for the user profile button.
With a traditional tool, this simple task becomes a frustrating, fragmented process. You would have to:
- Inspect the login page to get the first three selectors.
- Manually log in.
- Inspect the dashboard page to get the final selector.
This workflow is slow, inefficient, and completely breaks the "flow" of test creation. You can't capture locators across multiple pages in one go. Until now.
The Solution: Organic Navigation with Toggle Mode
This is the exact problem that Best-Locator was built to solve. Our Toggle Mode (pick-toggle) is a revolutionary feature that empowers you to navigate your application like a real user, capturing selectors across different pages and states in one single, seamless session.
Forget static page snapshots. With Toggle Mode, you are in complete control.
Step-by-Step Tutorial: Conquering the Sauce Labs Login Flow
Let's walk through a real-world example on the popular test site, saucedemo.com. Our goal is to get the locators for the username, password, login button, and the "Add to Cart" button for the first product after logging in.
Step 1: Launch Best-Locator in Toggle Mode
Open your terminal in your project's directory and run the following command. We'll use the --ai flag to get the highest quality selectors.
bestlocator pick-toggle https://www.saucedemo.com/ --ai
A browser window will open, and you'll see a small control panel in the corner. By default, you are in Navigation Mode.
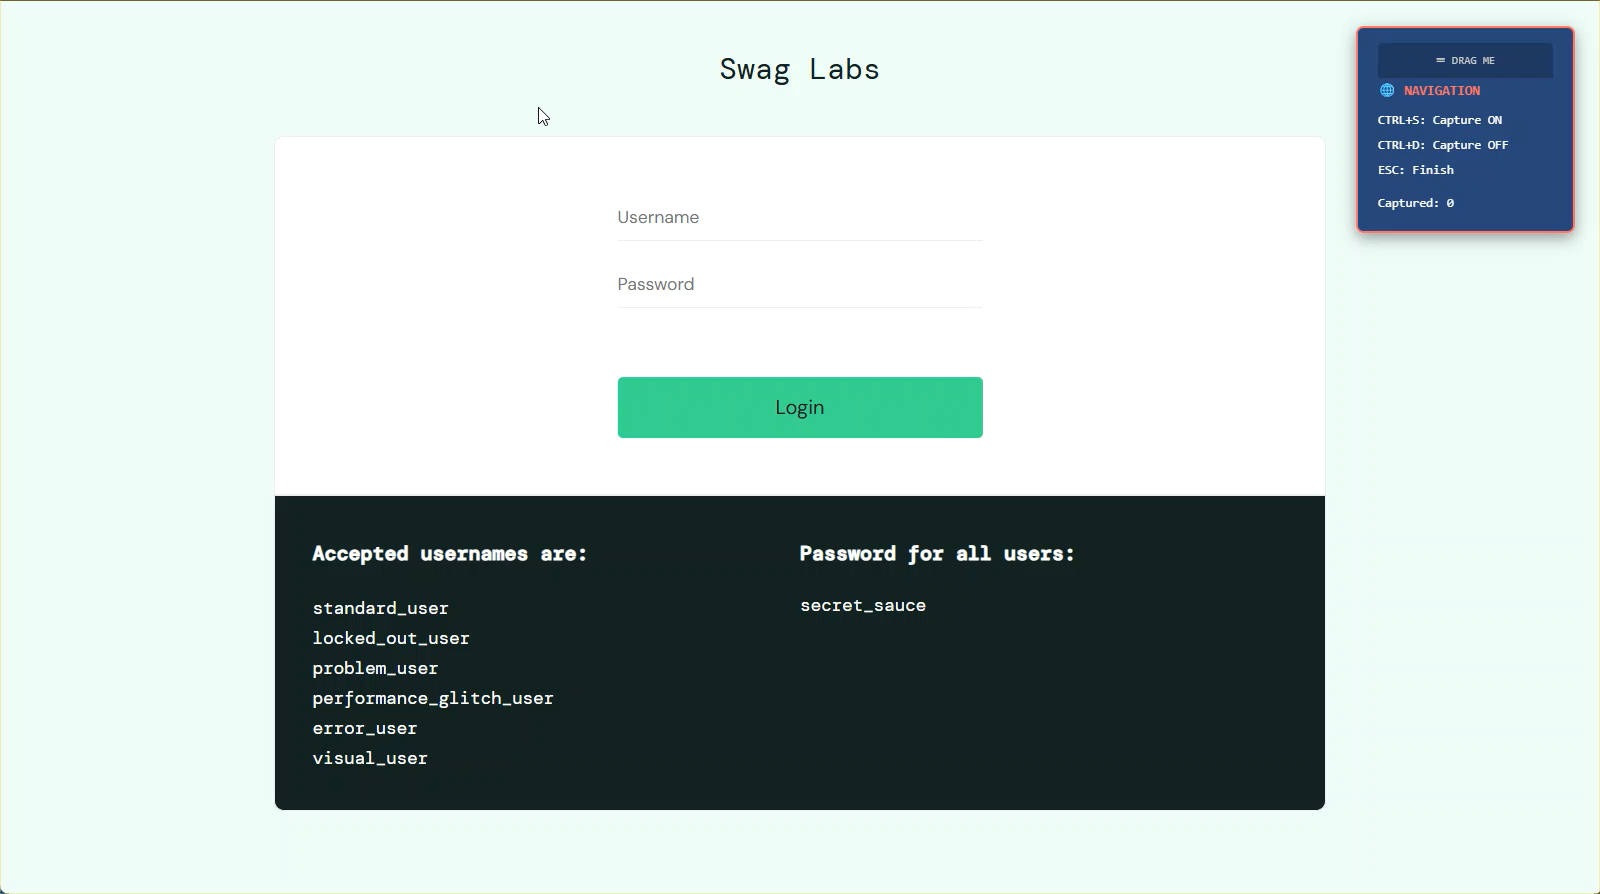
The control panel showing Navigation Mode - ready to browse freely
Step 2: Activate Capture Mode and Select Login Fields
The page is ready. Now, let's start capturing.
- Press CTRL + S on your keyboard.
- The control panel will turn green and the status will change to 🎯 CAPTURING.
- Now, every click you make will capture a locator instead of interacting with the page.
- Click on the username field.
- Click on the password field.
- The "Captured" count in the panel will update to 2.

Capture mode active - username field highlighted and captured
Step 3: Deactivate Capture Mode and Log In
We need to interact with the page to log in. Let's switch back to navigation.
- Press CTRL + D on your keyboard.
- The control panel will turn red again, back to 🌐 NAVIGATION.
- Now your clicks behave normally again.
- Click inside the username field and type
standard_user. - Click inside the password field and type
secret_sauce. - Before you click "Login," activate capture mode one last time on this page by pressing CTRL + S.
- Click the Login button. Its selector is now captured.
💡 Pro Tip:
You can toggle between capture and navigation modes as many times as you need. This gives you complete control over when to capture and when to interact.
Step 4: Capture an Element on the Next Page
You are now on the products page. The control panel is still in Capture Mode.
- Click the "Add to cart" button for the first item ("Sauce Labs Backpack").
- The "Captured" count now shows 4.
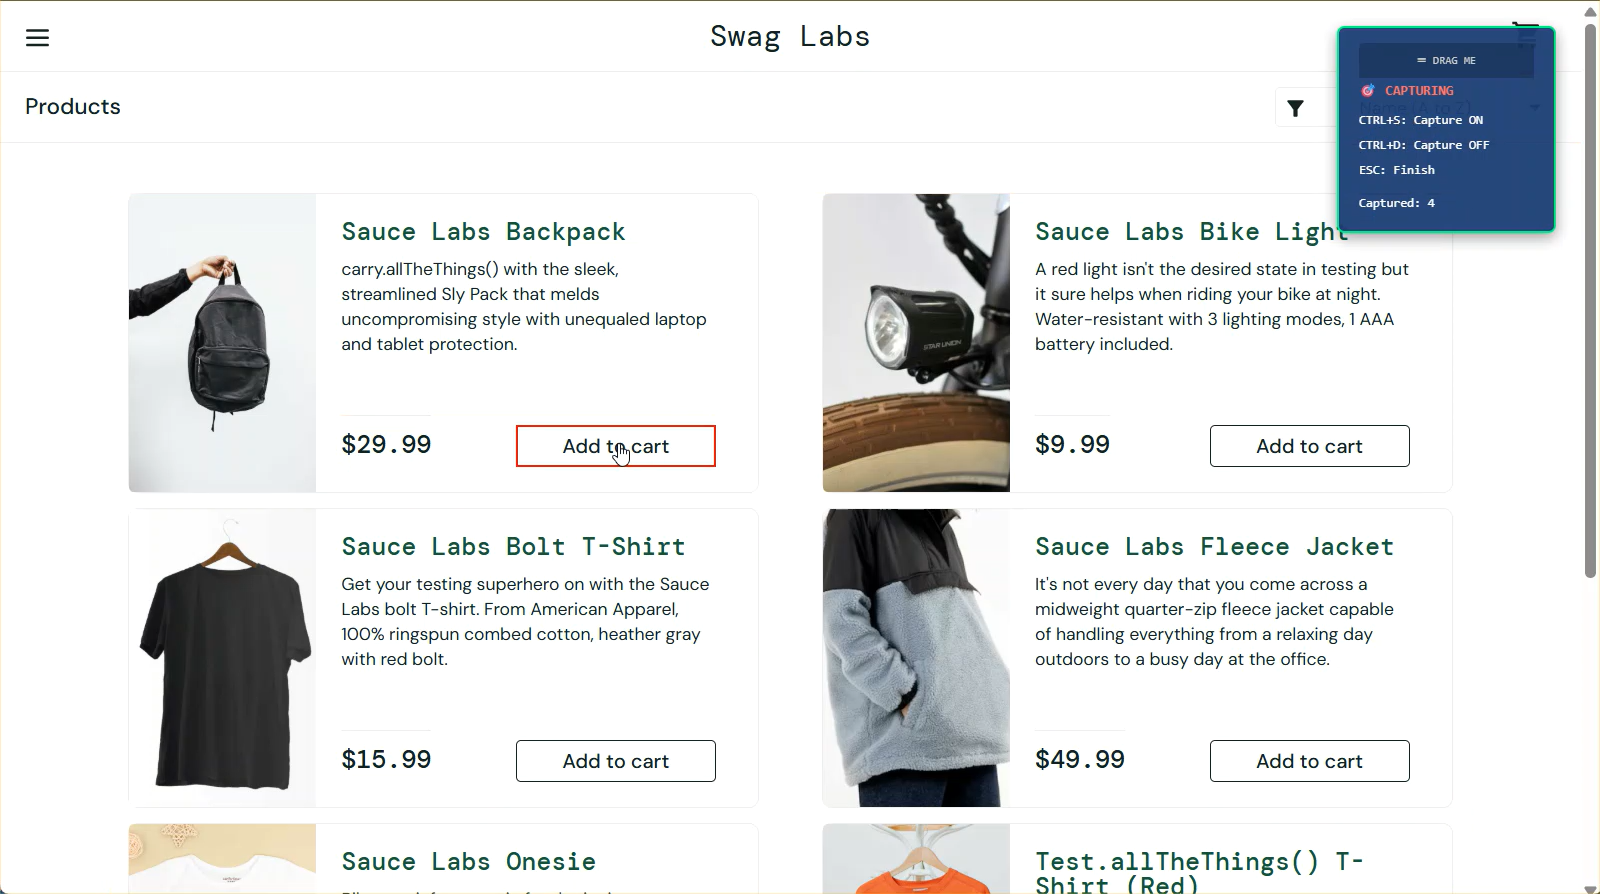
Products page - successfully captured 4 elements across multiple pages
Step 5: Finish the Session and Get Your Results
We have all the locators we need.
- Press the ESC key to end the session.
- The browser will close, and the final results will be displayed in your terminal.
# Terminal Output
🎯 4 element(s) captured!

🔄 Analyzing element 1/4...
   🎯 Selector:      username

🔄 Analyzing element 2/4...
   🎯 Selector:      password

🔄 Analyzing element 3/4...
   🎯 Selector:      login-button

🔄 Analyzing element 4/4...
   🎯 Selector:      add-to-cart-sauce-labs-backpack

✅ Toggle session complete!
📦 Summary of generated code:
   [1] await page.getByTestId('username')
   [2] await page.getByTestId('password')
   [3] await page.getByTestId('login-button')
   [4] await page.getByTestId('add-to-cart-sauce-labs-backpack')

✅ Summary copied to clipboard!
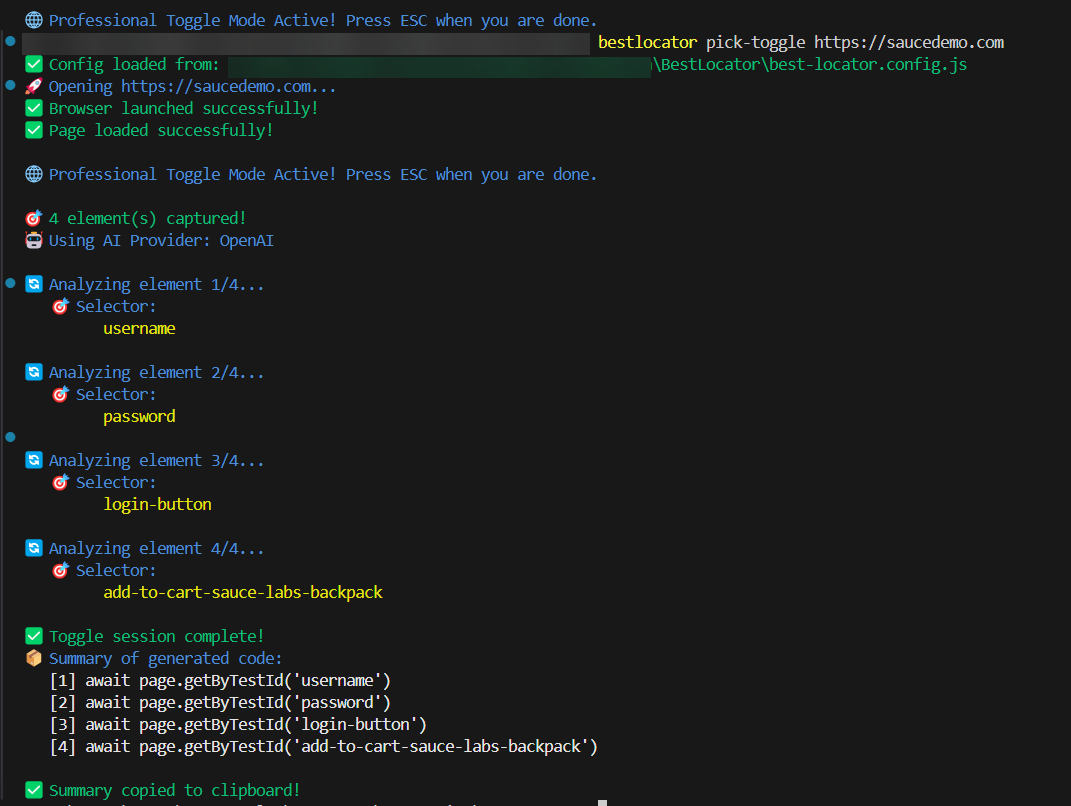
Final results - 4 professional-grade selectors captured across the entire flow
And just like that, you have four professional-grade, data-testid locators captured across a full user journey in one seamless, intuitive process. This is something no other tool can offer.
🚀 What You Just Accomplished:
- Multi-page capture - Selectors from login page AND products page
- Organic navigation - Real user interaction between captures
- Professional selectors - All using stable
data-testidattributes - One seamless session - No tab switching or manual coordination
Stop juggling tabs and manually piecing together your test scripts. Start testing at the speed of thought.
Ready to revolutionize your workflow?
npm install -g bestlocator